Before & After: The Master Suite

There are a few things missing in this room and a few things that are not 100% complete, however, it is ready enough to share!  I am still on the search for a rug that fits our master bedroom nicely, however, this has been a bit of a challenge given the natural light in the room.  Rugs that are one color in the store always seem to look a different color in this room – such problems!  Also, my fan is almost done…this is a jerry-rig creative adventure that I will explain in just a bit.

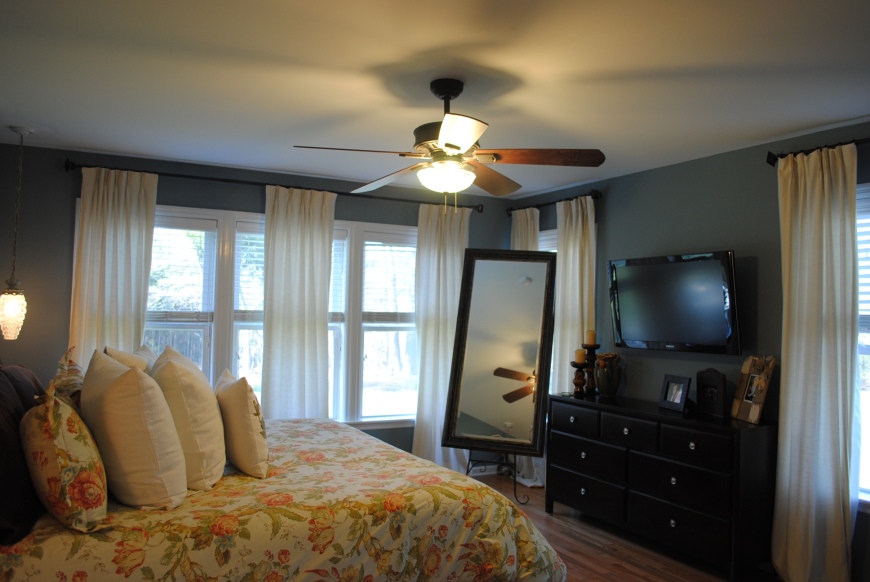
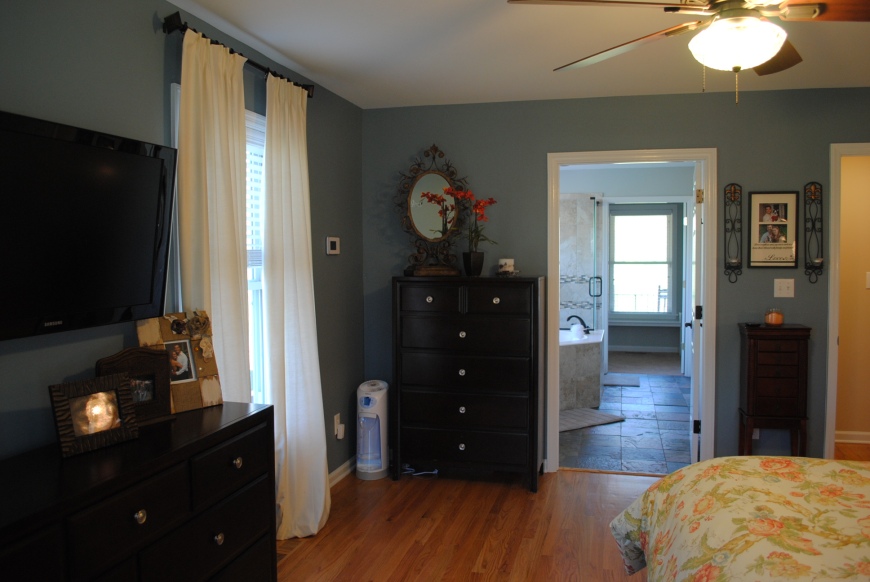
So…the master bedroom…that blue carpet again…I can’t take it!  If you look closely, you can see a large round stain in the middle of the carpet.  Perhaps there was a round bed in this room at some point?  Your guess is as good as mine…either way, this stain is just weird and pretty creepy.  The carpet had to go…  We replaced the carpet with hardwood floors to match the rest of the downstairs.  We also replaced the blinds to match the rest of the house.  The previous owners installed brown blinds in just the master bedroom and white in other areas downstairs…WHY?  We replaced the ceiling fan with oil rubbed bronze to match the door handles and fixtures throughout the house.  Interesting note on the fan…I couldn’t find a crystal globe to match our vintage lights in the room, so we got a little creative.  I found an old, horrible ceiling light at Habitat that had a crystal look.  A little switch-a-roo and now we have a jerry-rigged crystal globe attached to the ceiling fan.  We need to install an oil rubbed bronze collar above the globe to make the fan look complete…this is a project that is in process!  Lastly, we installed vintage lights above each night stand instead of lamps.  I found these lights at a local Pittsboro thrift shop and I am obsessed!

Master Bedroom Before:

Master Bedroom Before

Master Bedroom After:
DSC_0869
DSC_0871
DSC_0874
DSC_0875

Ahhh, so much more romantic!  Now for the master bathroom!  I think the only word to describe our master bathroom before is…white!  White floors, white counters, white walls, white tub, white shower…white EVERYTHING!  It’s like frosty the snowman threw up all over the bathroom.  Gross.  In fact, if someone wanted to completely torture me, stick me in a completely white room and I might stroke out…this may be worse than Chinese water torture.  I’m being dramatic!  Anyways, this bathroom was in some serious need of a splash of color.  How about a calming grey-blue to give the feel of a nice relaxing spa…ahhhh yes!  A few things that we did to transform this room; tiled the tub and shower, added glass to the shower instead of the random wall that looked like ginormous ice cubes, added oil rubbed bronze hardware, moved the chandelier above the tub and replaced with a new chandelier, added slate floors, added carpet in the attached closet, added granite counter tops for each sink, replaced cabinet doors to match those in the kitchen, replaced light fixtures above each sink and added frames to existing mirrors.  By the way, as I mentioned in a previous post, replacing cabinet doors instead of the entire cabinet is a much more budget friendly option that captures the look you are going for.  Also, ordering frames for existing mirrors is a fun and creative way to achieve the look you want without killing your wallet.  If you are interested, check out mirrormate.com and sign up for their newsletters as often they will have specials.  I got my frames 30% off on cyber Monday…SCORE!

Master Bathroom Before:

Master Bathroom Before
Master Bathroom After:
DSC_0876
DSC_0877
DSC_0878
DSC_0879
DSC_0880
DSC_0881

There is a little toilet room that hangs off directly in front of the shower, however, I thought a picture would be sorta boring.

Here are a few pictures of our master closet that is attached to our master bathroom.  My husband replaced all the shelving himself…I love him!  Much more space than previous shelves which allows husband and wife to share a closet…if you would have mentioned this option to me a year ago, I would tell you that you are crazy!  But it works!!!
DSC_0882
DSC_0883

How to throw a Man-Birthday Party!

How do you throw a birthday bash for a 28 year old man?  There are the obvious essentials such as beer, food and, well, beer… but, what do you do at a man-party?  We usually have the parentals and brothers over, cook whatever the birthday boy wants and provide lots of beer….obviously!   But this year, I wanted to do something different.  I wanted to decorate for husband’s birthday party.  We are in a new house and I no longer have a job so this was the year to do it up!  So, I consulted with my friend Pinterest.

After searching on Pinterest for about an hour, I found nothing…nothing on man birthday parties.  I could only find ideas for little man parties (you know with that trendy mustache).  I.Could.Not.Find.Anything.  Sad face!  BUT..what I did find was a method for hanging balloons on string and hanging on the wall.  This seemed like a pretty cool idea!  AND Angry Birds!  Because, what man doesn’t  like Angry Birds?  I think every person on this planet that owns a smart phone has downloaded Angry Birds and has probably beat the game.  I might know a lady that has also beat the game…I am not ashamed!

Here are some of my ideas for decorating with LOTS of balloons and Angry Birds.  And yes…I blew up all those balloons myself and didn’t pass out!
DSC_0835
DSC_0837
DSC_0836
DSC_0852
So man birthdays and an itinerary!  The original plan was to shoot guns outside for a few hours and then come in for dinner.  However, due to the all-day-snowfest we experienced here in good ol’ NC, we needed a plan B.  Football game?  Nope…these men took full advantage of the pool table in the bonus room, with of course, lots of beer…and LOTS of chips and candy!  I spent the entire day before preparing spaghetti and homemade meatballs (arg…so manly)!  I also baked the birthday cake, lemon blueberry cream cheese pound cake!  YUM!  Preparing the food a day earlier made party day so much less stressful and way more fun as a host!  While the boys played pool, us Moms and Moms-to-be chatted it up and warmed up the food.  So darn easy and so much fun!  Yummy food, a cozy fire and warm company…it was a success!
DSC_0845
DSC_0842
DSC_0838
DSC_0846
DSC_0855
DSC_0862

From Old Desk to Distressed Hall Table

I love the look of distressed furniture but have always shied away because of the massive amount of time and work that goes into this.  I have never been that  patient of a person and was not sure I had the patience for striping, then sanding, then painting, then sanding again and then painting…blah blah blah…  Plus I was not all that comfortable using stripping chemicals while preggers so an alternative was desperately needed.  So, I googled “distressing furniture” and found a SIMPLE and FAST tutorial that involves Vaseline and a little bit of interior paint.  Hmmmm…seems easy enough!

So I was given this old desk that worked great in my guest room back in our old house.  Only problem was, my guest room didn’t have enough room for another piece of furniture so this desk sat in our spare room (aka future baby room) for 6 months collecting dust.  I thought about giving it away or donating it but never got around to it.  One day I was sitting in this spare room with my mom discussing inspiration for a little boy or girl nursery and BAM…it hit me!  I swear I am like a cat…can’t pay attention to anything for more than 5 minutes before my mind wanders into a totally different direction.  “MOM I know what I can do with that desk!”  My mom has dealt with Brittany ADD for 27 years now so I am sure she is just used to it.

Here is a terrible picture of the desk before…sorry for the blurriness!  I can’t believe I found this picture from an old iPhone back-up…some things are just meant to be!
IMG_0246

This desk is essentially two pieces; the top part and the bottom part.  Both parts will be transformed into something totally different, but for today, we will discuss the Distressed Hall Table.  I thought it would be really cool to incorporate an old shutter as the top part of the table…so off to Habitat I went.  Believe it or not, wooden shutters can be difficult to find as many are actually plastic.  Obviously wooden shutters makes more sense for a table if you consider the stability of the piece.  Two wooden shutters for $12…SCORE!  This project only requires one shutter.

How to Distress Using Vaseline:
  1.  Choose the piece of furniture/wood/project that you would like to distress.  Lightly sand the piece by hand.  Seriously, don’t spend more than a few minutes on this step because it is a waste of time.  Your piece more than likely already has existing paint or stain or whatever that you can use to your advantage…be creative!
  2. Blow off your piece with compressed air or a lawn blower (Red Neck but works great).  Paint a super thin coat on the corners and edges of your piece a dark color (or whatever color scheme you would like).  Remember this step will eventually be the color that will show through to give a distressed look.  Let the paint dry (1 hour at the most).  Since my desk was black, I didn’t need to do step 1 or 2.
  3. Now for the fun and moisturizing part of this project!  Smear a thin amount of Vaseline along the edges and corners of your piece, covering the dark paint you just finished in step 2.  You don’t need to let the Vaseline dry because it won’t…LOL!
    1. NOTE:  The thicker the Vasleine coat you use, the more that the paint will come off in later steps…totally your call.  Thicker Vaseline layer is more difficult to work with in the end and will be much messier.
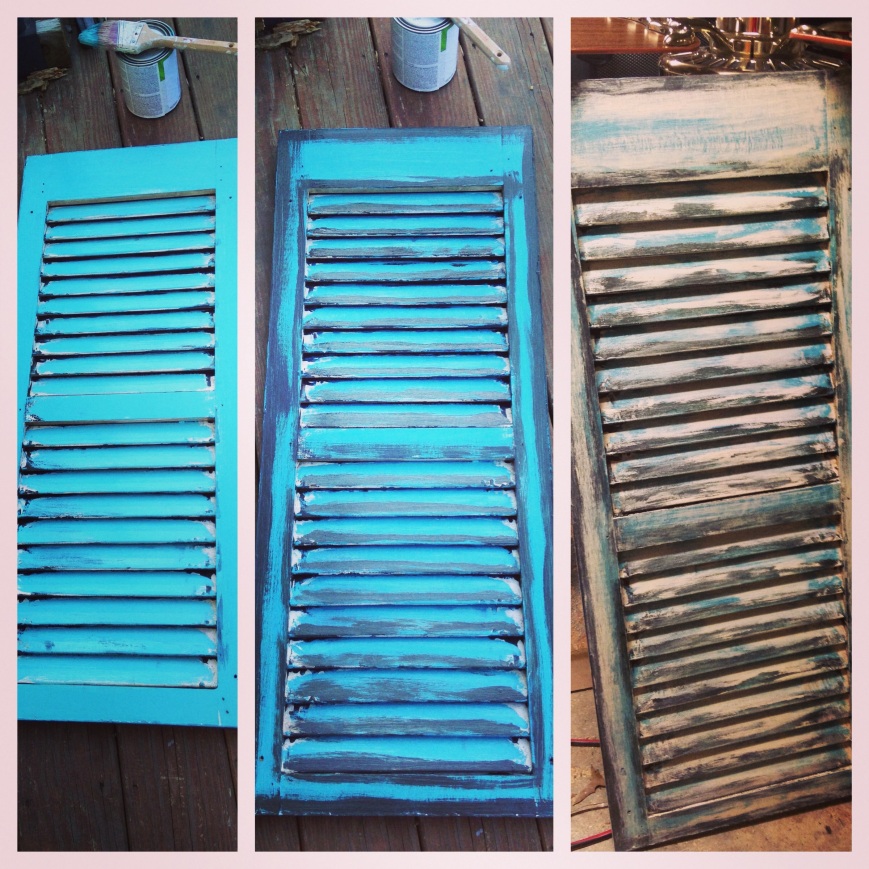
  4. Using FLAT paint in a light color (I used cream color) and a paint brush, apply a light coat all over the peice.  Remember, the goal here is to make the piece look distressed so don’t get all OCD on this step.  The less perfect you paint this layer, the better it will look in the end.  Be creative and try not to cover the whole piece with tons of paint.  Let paint dry (not more than an hour).
  5. Using sandpaper or those sand pads you can get at any hardware store, lightly sand the edges and corners of the piece (remember in step 2?).  BOOM – distressing made easy!
    1. NOTE:  You can incorporate several colors if you wish!  I did this with the shutter.  I used teal, dark brown and cream.  Just be sure to add an additional step of painting before you apply the Vaseline.  Be creative…you can’t go wrong with to many colors.

Shutters

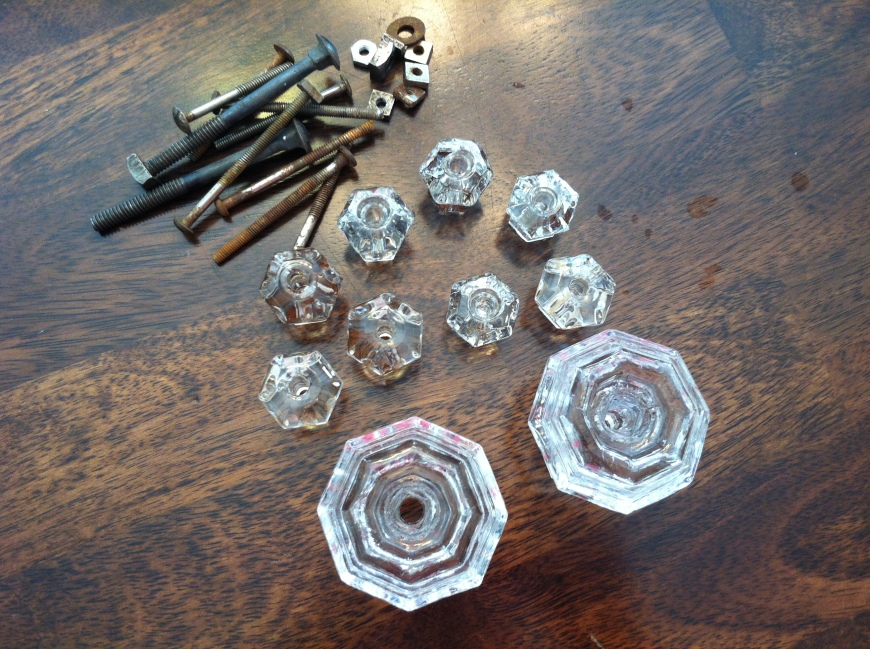
Putting the table together was pretty easy!  All I needed was an electric drill, drill bits, screws and a husband!  Since the desk already has legs and a base, the only step left to do was assemble the shutter to the top.  The desk was already set up for a top so literally all we did was screw the shutter onto the base of the desk…very carefully!  Actually, I shouldn’t take credit for this as my husband did most of the work…okay all of the work!  Thanks Hun!  OH…and I added vintage crystal knobs to the functional drawer.

Crystal Knobs

Table After Distressing with Shutter Attached!  Enjoy!  I am super proud of this project!

Shutter Table

Table in Hallway

Remember that awkward wall I talked about in the “Big H” hallway upstairs?  This desk and picture works perfectly in this space!  To read about the “Big H” in our upstairs hallway and envision where this desk is placed in my house, click HERE.

DIY: Beautifying an Old and Ugly Sconce

Most of the time when browsing through the isles of a thrift store you think “seriously, not sure who would ever want that…” and then, out of the corner of your eye, you see something kinda ugly and you have that hmmmmm moment.  In this moment, you stop and stare for a few minutes, thinking, “I think this is ugly but there is something about this I kinda like.”  Hmmmmmm…

Yup, happens to me all the time.  The next thought is usually, “okay I can make this look really cool with a few minor tweaks but where on earth will I put it?”  My husband’s subconscious thanks me for this thought that he has NO CLUE that I always have because his worst fear is that the item will become the long lost project and end up in…dun dun dun…wait for it…his garage!  The “Garage” – the Husband’s room/space where his wife can not tell him “let’s paint the walls this color.  It will go great with…” or “No, that doesn’t look good there” or “Very cool but this doesn’t match….”  (waaa waaa waaa slow motion Charlie Brown)!  Yup, this is his space and wifey’s projects are forbidden to live here for long periods of time.  Fair enough!

Anyways, back to the old and ugly and outdated sconce that I found at the local “Guardian Angel” Thrift shop!  Time to beautify this diamond in the rough.  This project was super easy and inexpensive!

Sconcce
Only 3 things to modernize a sconce:
  • An old inexpensive sconce
  • Wire
  • Vintage crystals
Materials needed to transform sconce:
  • Spray paint (I used oil rubbed bronze…black also works)
  • Small piece of sand paper
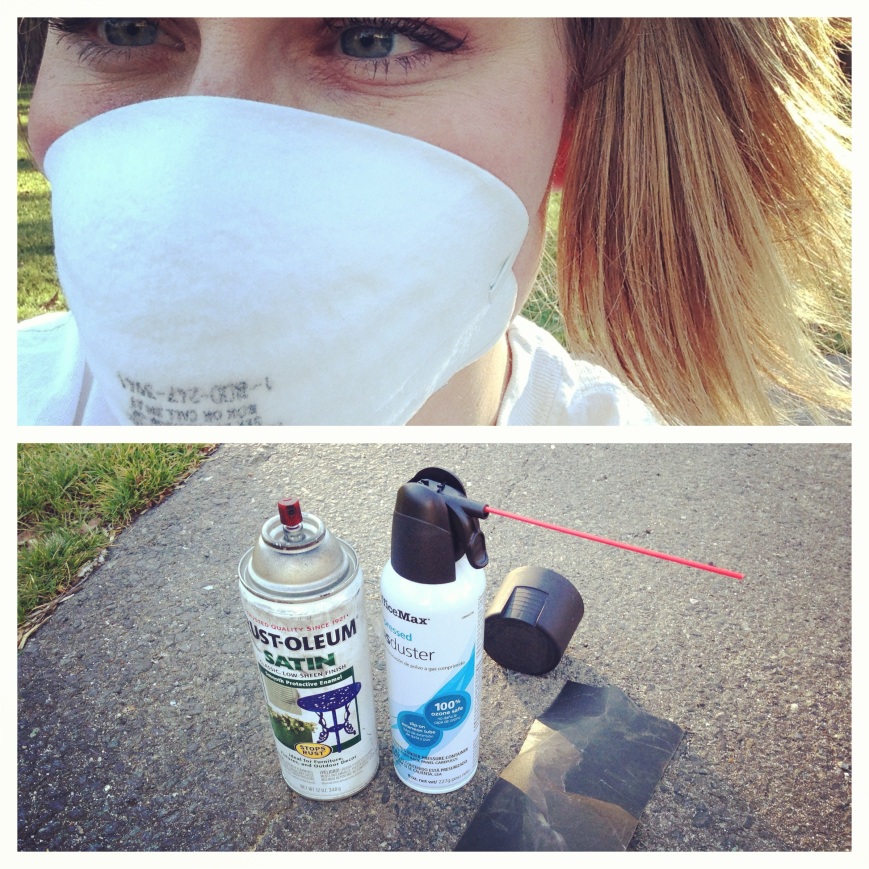
  • Compressed canned air
  • Protective mask
Disclaimer:  Yes, I am preggers so spray painting must be done very carefully as to not harm little fetus growing inside of me.  ALWAYS spray paint outside in the open air where there is plenty of ventilation.  Wear a mask and spray with the wind.  Spray for 10-20 seconds and walk away.  By doing this, you will not smell the toxic fumes making it totally fine to spray paint while preggers.  Or, there is always the option to ask the hubby to spray paint for you…in his garage!  JUST KIDDING!
spray painting safelyTo prep the sconce, use that handy-dandy compressed air to get all the dust off.  Lightly sand (like seriously this should take less than 3 minutes).  Spray paint the sconce lightly keeping in mind that heavy will cause drippage.  Drippage = fail…sand and start over.  When lightly spraying the sconce, you may need a few coats.  Allow to dry for a few hours.
Spray Paint
Once scone is dry, it’s time to add those fabulous crystals to add drama.  Try and use wire that is similar to the color of the sconce (after painted).  Secure the crystals to desired place(s) on sconce.  BOOM – you are done!
Tip – I purchased my crystals from a local Pittsboro antique store.  These crystals are remnants from an old crystal chandelier.  These needed a good cleaning before hanging on the sconce.  Simple recipe for cleaning crystal: warm water, white vinegar and dishwasher soap.  Let soak for 20-30 minutes then rinse and dry…super easy! 
Crystal
The scone is ready to hang on the wall.
Here is my sconce after these simple modernizing steps.  Enjoy!
After Sconce2

After Sconce